Print Dialog
Used to adjust printing settings and create a print file, a PDF file, or to print directly to a system printer.


| Setting | Description |
|---|---|
| Printer list | Lets you
select a printer for the Print dialog. By default, the
Display Labels of all found printer driver configuration
files, plus a list of all Windows printers defined for the system are displayed
in the printer list.
|
| Paper Size | Lets you choose the paper size from a list of available paper sizes for the selected printer. The NONE form is available if the print destination is set to Send to InterPlot and the selected printer is an InterPlot printer that supports the NONE form. When printing to the NONE form, the system automatically sets the form size to the print size. For example, if the form size is 100 x 100 inches, and the print size is 34 x 22 inches, the form size is set to 34 x 22 inches when the Paper control is set to NONE. |
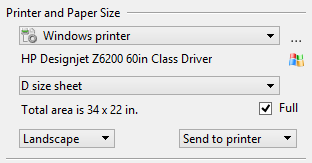
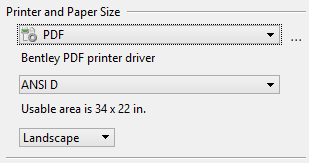
| Usable area/Total area/Paper size | (When Windows driver is selected) When Full Sheet
is off, displays the usable area, or printable dimensions (width x height) for
the selected paper. When Full Sheet is on, displays the total area (width x
height) for the selected paper.
(When Bentley driver is selected) When the Allow paper size editing check box is on in the Print Preferences dialog, the Paper size fields appear. You can change the size of the selected form. |
| Full | (Visible only when Windows driver is selected.) If
on, it is the same as having the
Full Sheet Mode property set. It also changes the Usable
area field to Total area.
If off, only the printable portion of the sheet is considered. For example, when printing to a letter size sheet, typically 8.5 x 11 inches, the maximum print size may be only 8 x 10.5 inches. If full sheet is enabled, the maximum print size is the size of the sheet (8.5 x 11 inches). When Full is enabled some geometry may be clipped (by the printer) if it falls into the unprintable area around the edge of the paper. |
| Orientation | Lets you choose the orientation of the paper —
Portrait or Landscape.
This control lets you quickly reverse the X and Y values of the Paper Size property without having to edit the printer driver configuration file. This is necessary for the printer.pltcfg and helpful for some PostScript to PDF workflows. |
| Destination | Lets you choose the print destination:
|
| Area | List box that lets you choose the area to print. |
| View | List box that lets you select the view to use for printing. |
| Color | List box that lets you select the output format — Monochrome, Grayscale, or True Color. Available options depend on the capability of the selected printer. When the Print to 3D check box is selected, the color is set to True Color and cannot be changed. |
| Rasterized | If on, output is sent to the printer as a single raster image. |
| Copies | (Enabled only when the currently selected printer driver supports multiple copies.) Lets you set the number of copies to be printed. |
| Print to 3D | (Visible only when a PDF printer driver is selected) Plots to PDF, as 3D data in Universal 3D (U3D) format, the master model, and all references. The 3D content will contain any visualization data and settings that already exist within the design file such as lights, materials, and animations or flythroughs. When the PDF file is viewed in Acrobat 7 or later, the document contains a 3D view with controls that let you rotate, zoom in/out, or walk through the 3D model, as well as running an animation, if any. |
| Show design in preview | (Visible only if Show Preview is displayed.) If on, the region of the design to be printed is displayed in the preview image. If off, displays the defined sheet, with margins. |
| Refresh preview (icon) | (Visible only if Show Preview is displayed.) Clicking the Refresh preview icon, below the preview image, refreshes the preview image. |
| Scale | (Visible only if Show Preview and Show Details are displayed.) Sets the scale of the printed output. By default, this is displayed as master units to paper units. You can use the Method setting in the Scale Assistant to change this display to paper units to master units. |
| Scale Assistant | (Visible only if Show Preview and Show Details are displayed.) Clicking the Scale Assistant icon opens the Scale Assistant dialog, which lets you select the scale for the printed output. |
| X Size | (Visible only if Show Preview and Show Details are displayed.) Sets the X, or width, dimension of the printed output, in printer units. |
| Y Size | (Visible only if Show Preview and Show Details are displayed.) Sets the Y, or height, dimension of the printed output, in printer units. |
| Maximize | (Visible only if Show Preview and Show Details are displayed.) Automatically fits the selected view or fenced area into as much of the printable area as possible. |
| Rotation | (Visible only if Show Preview and Show Details are
displayed.) Lets you select the rotation of the printed output. For prints that
are not rendered and do not contain a camera definition, you can specify any
rotation in the 0–360 degree range. For rendered prints or prints containing a
camera definition, you must choose from the list box one of the orthogonal
rotations below.
Note: If Hide
advanced layout controls is checked in the
Print Preferences dialog, you must use the list box to
select an orthogonal rotation.
|
| X Origin | (Visible only if Show Preview and Show Details are displayed.) Sets the horizontal distance in printer units from the lower left corner of the printable area to the lower left corner of the page. The default X Origin and Y Origin settings center the printed output in the printable area of the page. |
| Y Origin | (Visible only if Show Preview and Show Details are displayed.) Sets the vertical distance in printer units from the lower left corner of the printable area to the lower left corner of the page. The default X Origin and Y Origin settings center the printed output in the printable area of the page. |
| Auto-center | (Visible only if Show Preview and Show Details are displayed.) If on, the printable area is centered on the page. |
| Upload PDF to ProjectWise Share | This option displays only if the following
conditions are met:
When selected, the PDF file is first written to the local drive. Then, the CONNECTION Client sends the file to the ProjectWise Share in a separate background process. The file name on the ProjectWise Share will be the same as the one on the local drive. If a file with the same name already exists in the ProjectWise Share, it will be overwritten. |
| Print/Print to File | When the selected printer is the Windows printer,
the printed output is sent to the printer.
When the selected print destination is a file instead of a Windows printer, IP address, or UNC share, the button text changes to Print to File. When selected, the Save Print As dialog opens, to let you save the print file to disk for later submission to the required printer. Effect is the same as clicking the Print icon or the menu item. |
| File > Preview | Opens the resizable
Preview window, which lets you preview the proposed printed
output.
Effect is the same as clicking the Preview icon. |
| File > Print | When the selected printer is the Windows printer,
the printed output is sent to the printer.
When the selected printer is not the Windows printer, the Save Print As dialog opens, to let you save the print file to disk for later submission to the required printer. Effect is the same as clicking the Print icon. |
| File > Select Printer Driver Configuration | Opens the Select Printer Driver Configuration File dialog, which lets you select a printer driver configuration file. |
| File > Select Windows Printer | Selects printer.pltcfg as the printer driver configuration file, which uses the Windows system printer. |
| File > Configure Windows Printer | Opens the Windows Print dialog, which is used to select the printer, page range, and number of copies for the Windows system printer. If the selected printer driver is not the one for the Windows system printer, this menu item is disabled. |
| File > Edit Printer Driver Configuration | Opens the current printer driver configuration file for editing. The correct editor is chosen based on the printer driver configuration file's format. The Printer Driver Configuration Editor is used to edit .pltcfg files and Notepad is used to edit .plt files. |
| File > Reload Printer Driver Configuration | Reloads the current printer driver configuration file to include any changes. For example, after editing the printer driver configuration file, you need to reload it to take advantage of any changes that you have made. |
| File > Exit | Closes the Print dialog. |
| Settings > Units | Opens a submenu that lets you select the printer measurement units used for the Print dialog. Choices are: inches, feet, mm, cm, dm, or m. |
| Settings > Update from View | Updates the preview area.
Effect is the same as clicking the Update from View icon. |
| Settings > Set Fence from Fit All | The print area is automatically calculated to include every element in the master model and all references and the Area is set to Fence. |
| Settings > Set Fence from Fit Master | The print area is automatically calculated to include every element in the master model and the Area is set to Fence. |
| Settings > Print Attributes | Opens the
Print Attributes dialog, which lets you set various printing
attributes.
Effect is the same as clicking the Print Attributes icon. |
| Settings > Raster Options | Opens the Raster Options dialog, which lets you set the parameters for raster reference printing. |
| Settings > 3D Plotting |
(Enabled only when using a PDF printer driver) Opens the 3D Plotting Options dialog, which lets you define the settings for 3D content in a PDF file. |
| Settings > Visible Edges Settings | Opens the Visible Edges Settings dialog, which provides controls for printing visible edges display styles in non-rasterized mode. |
| Settings > Preferences | Opens the Print Preferences dialog, where you can select user interface, page layout, sheet definition, preview, and print engine preferences. |